Healthy Chow Mein? Yes, Please!!

I LOVE Chinese food! But let’s be real, it’s not the most healthy of meal choices. So, I’ve been trying to come up with alternatives to use, in place of the parts that aren’t so great for you. Chow Mein is made with veggies and meat(which are great), but those noodles, for me, are where I need to look for an alternative. (I’m really trying to keep my carbs down.) So, when I tried spaghetti squash for the first time, chow mein was one of the first things that came to mind. So, I tried it, and I was pleasanlty surprised, because it was good! Really good! So, I’ve got to share!! 

This dish is pretty simple. I definitely made a simplified version of this dish. I didn’t “velvet” my chicken or anything. So, this should be a pretty easy one. (If you don’t know what “velteting meat” is, don’t feel bad, I love food and cooking, and have my own food blog, and I didn’t even know what it was until I was researching chow mein recipes. Apparently there are multiple different ways people do this, but it is a process used to tenderize the meat in Chinese food dishes. That’s why the meat is always so soft and tender and not dry! Who knew?!? 😳 I’ll have to try that another time.) 

You could use your own favorite Chow Mein recipe and just substitute the spaghetti squash for the noodles you usually use, and it would make it a little more healthy, or you could use my super simplified version. Up to you.  

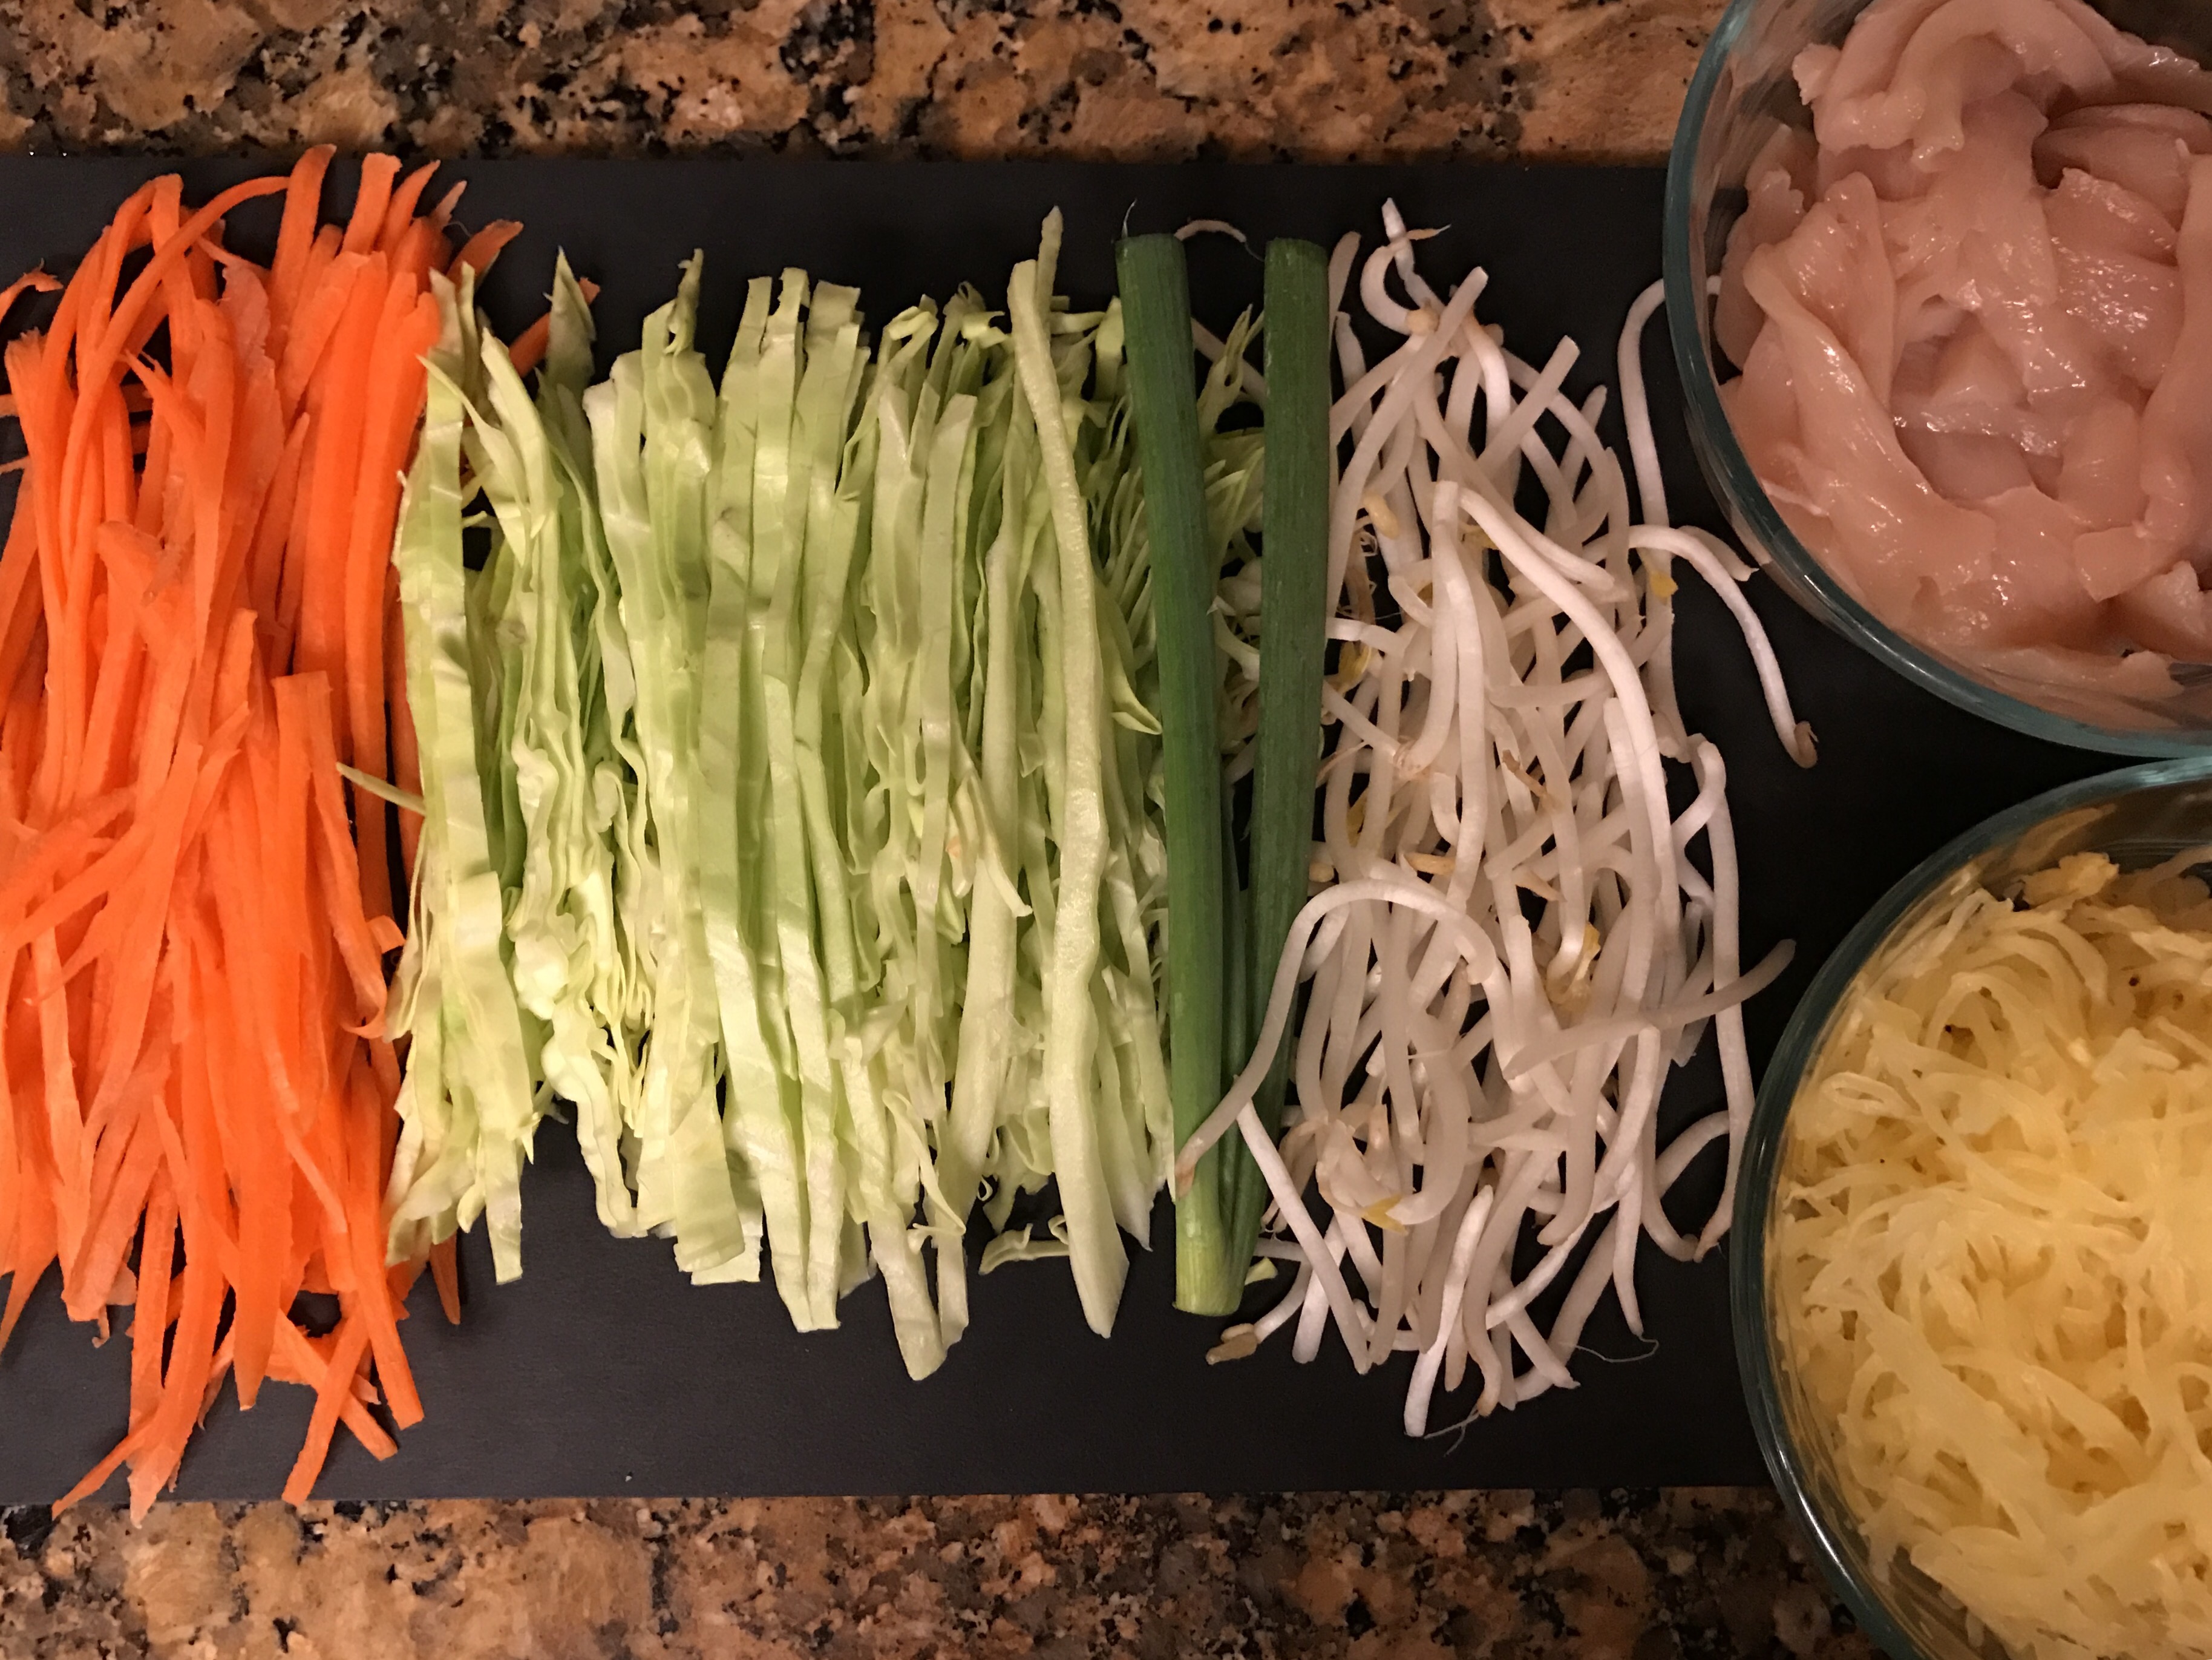
(All the produce and meat you will need is in this pic)

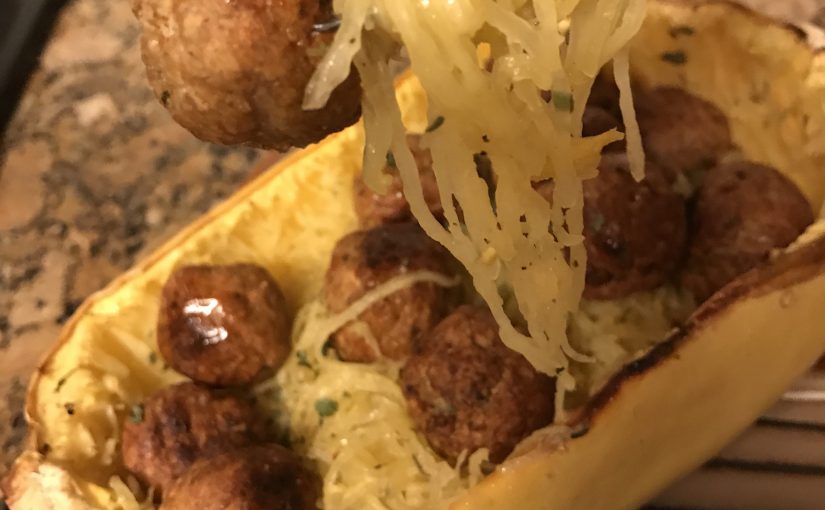
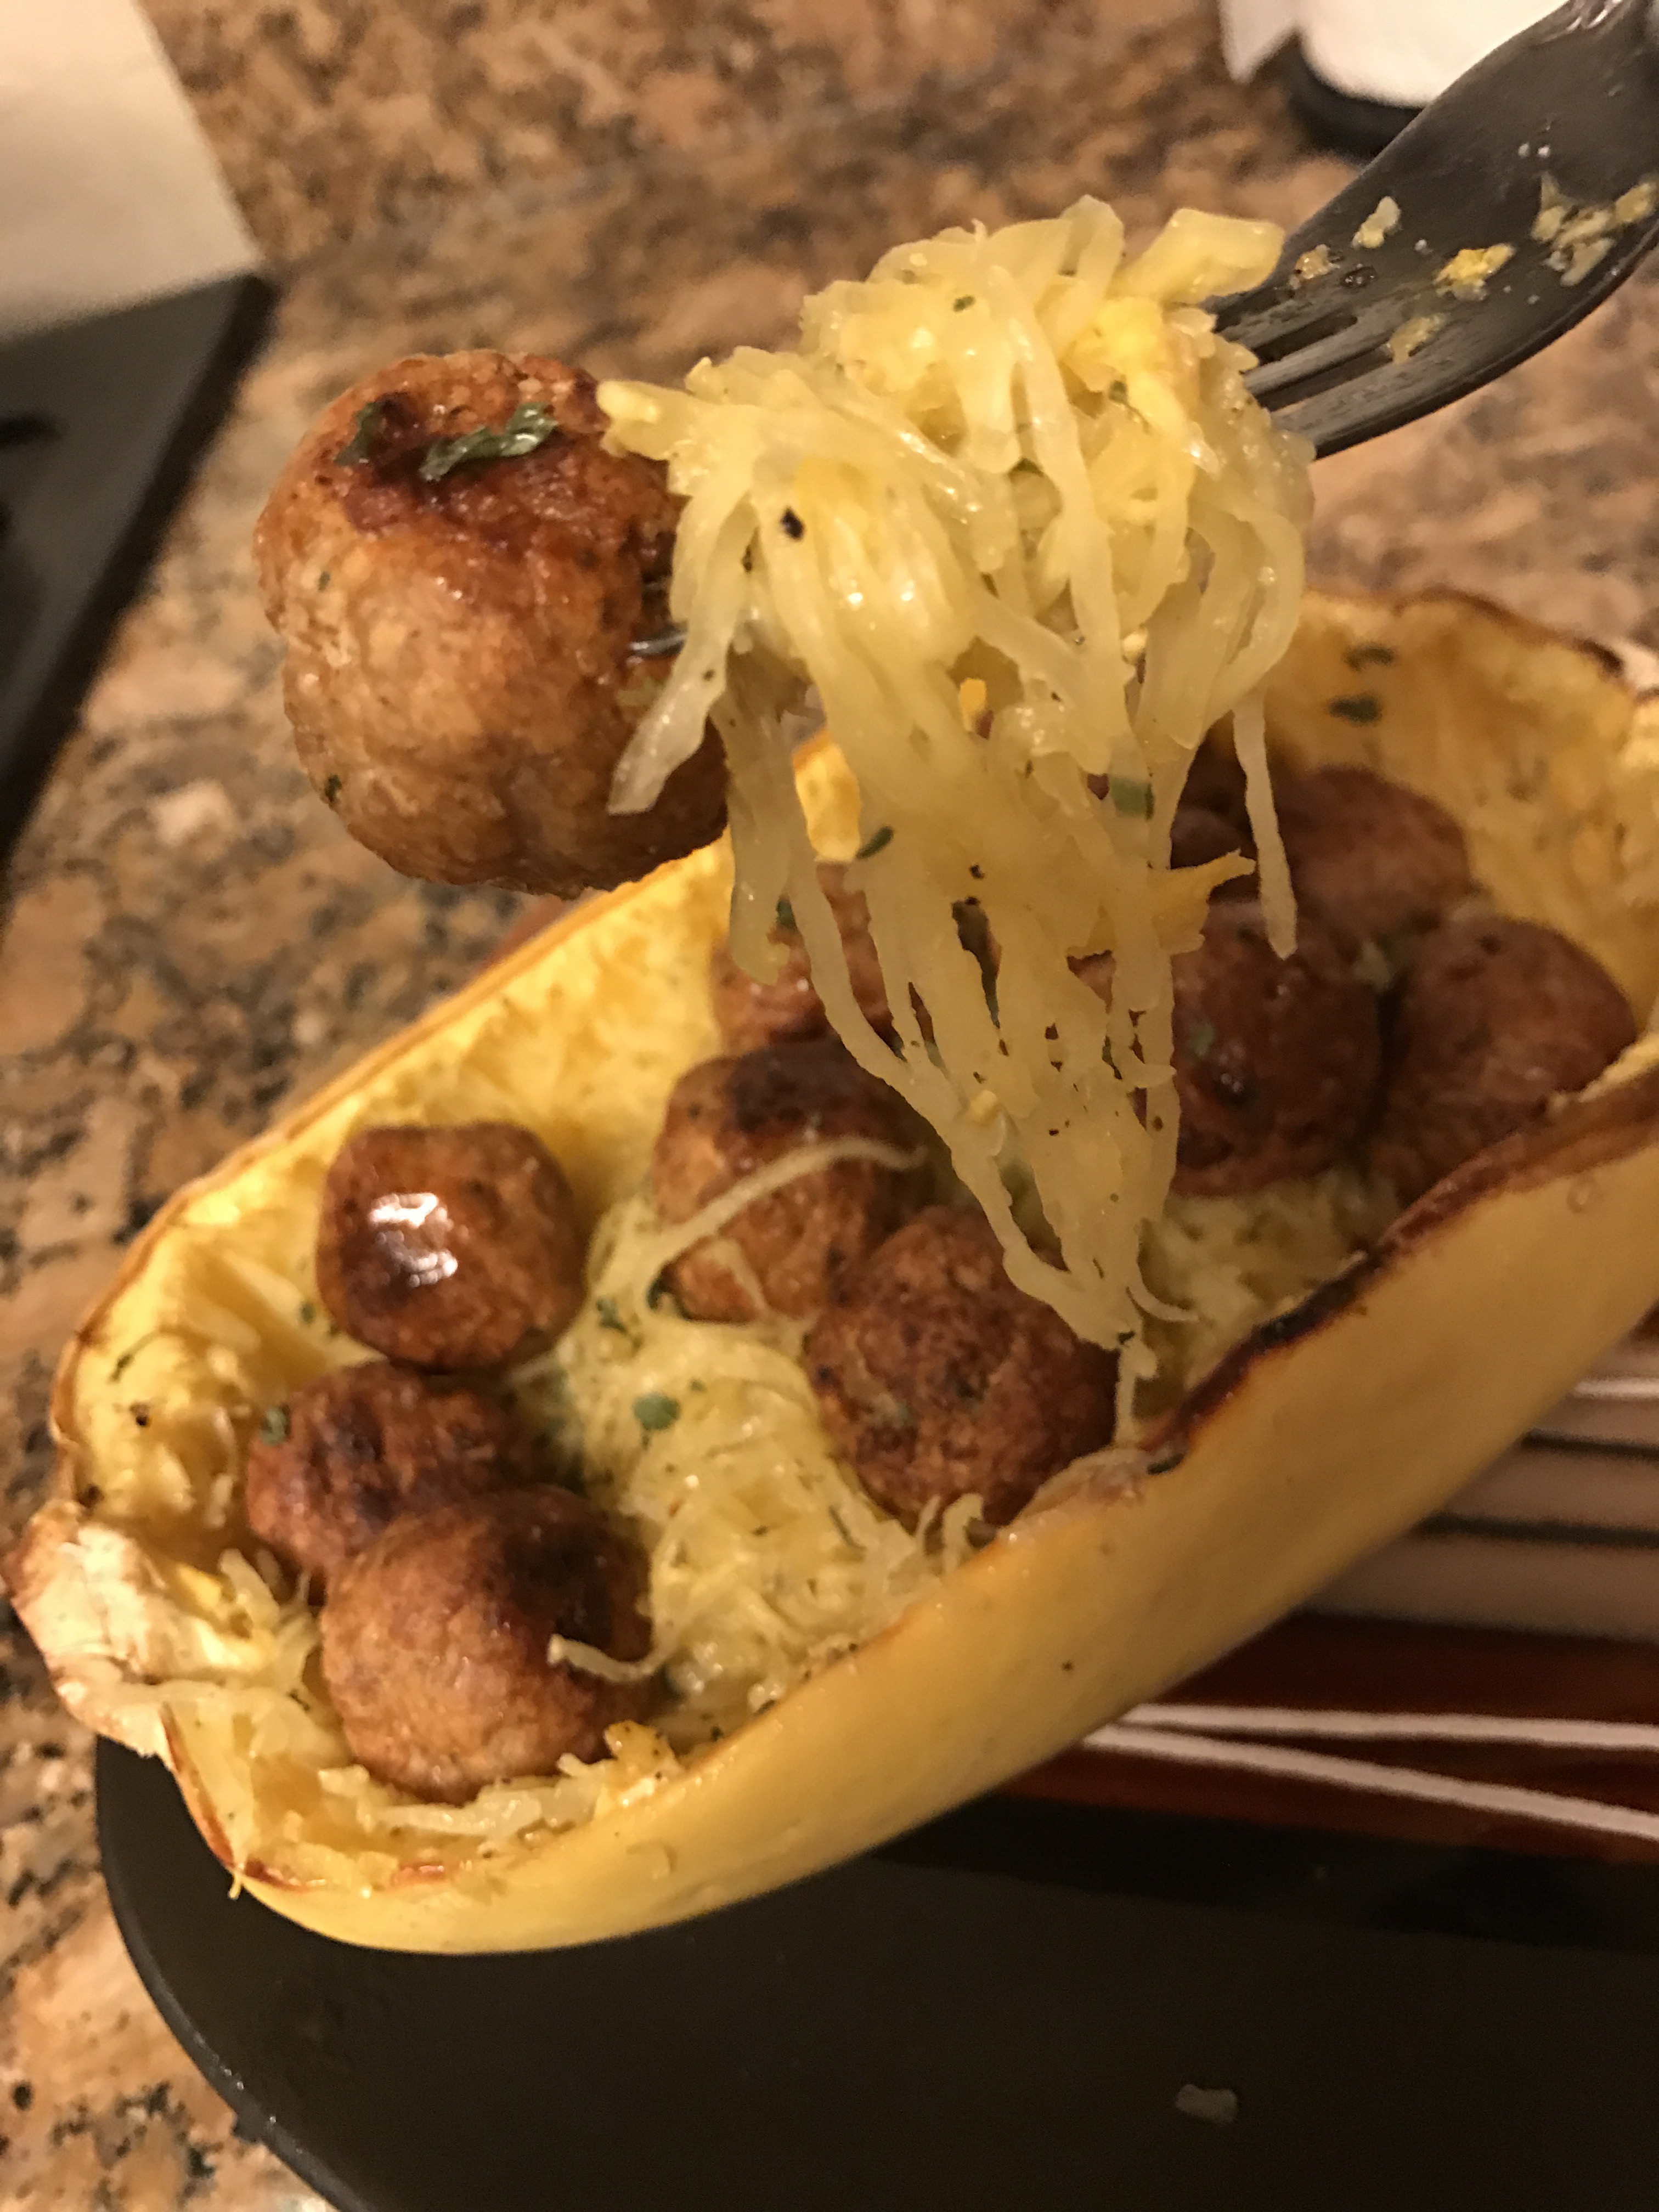
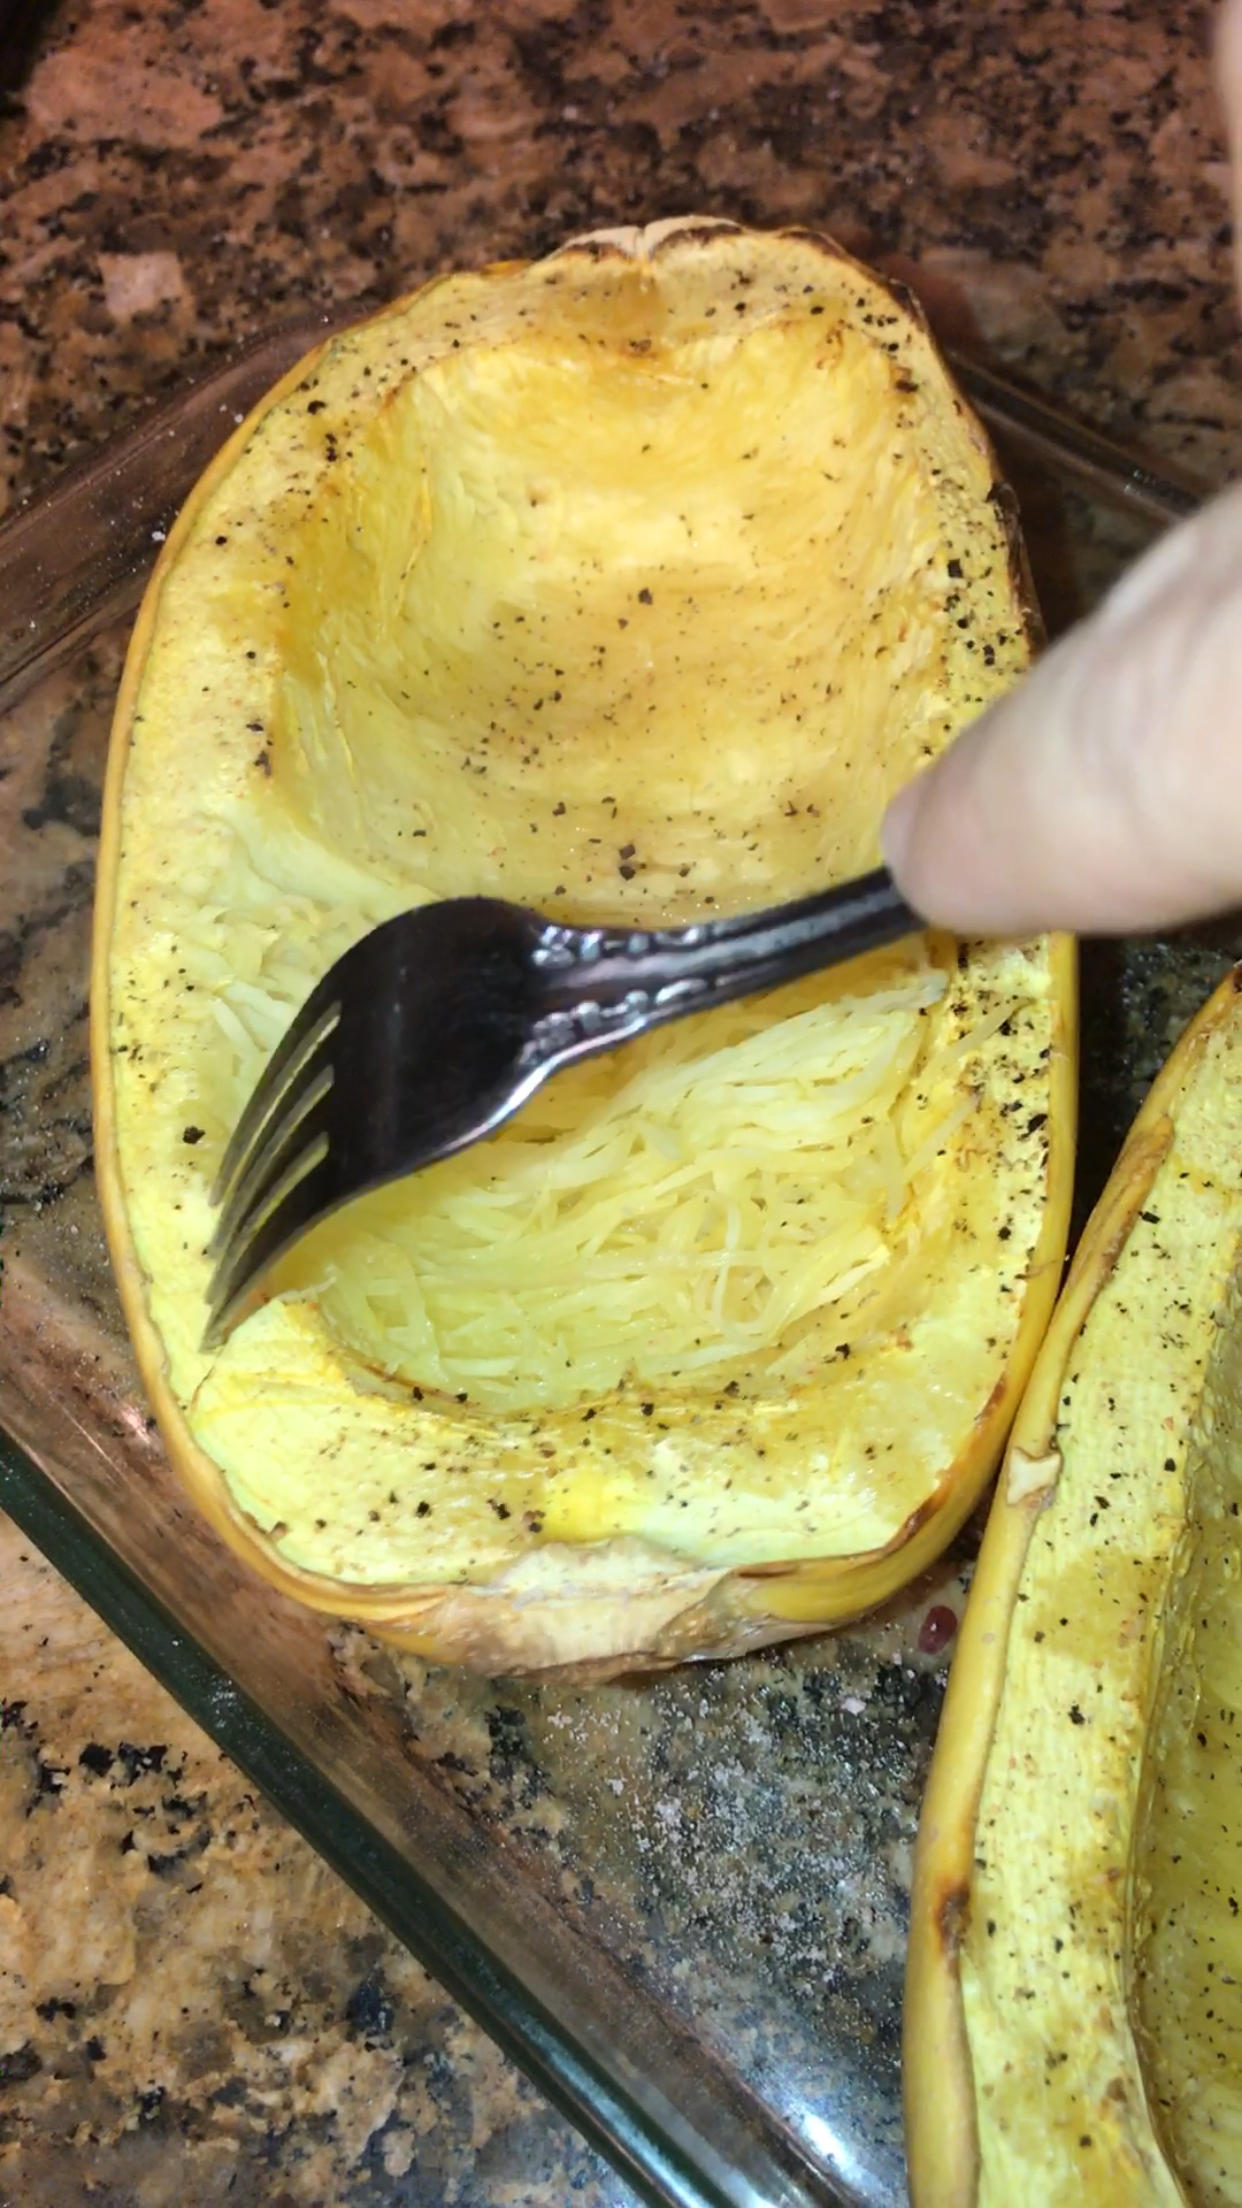
    You will need: 1/2-1 tbsp olive oil, onion powder, garlic powder, and low sodium soy sauce, and [pictured] julienne carrots, thinly sliced cabbage, bean sprouts, green onion, thinly sliced chicken breast, and spaghetti squash (1/2 squash- pictured/used) [ in case you’ve never cooked spaghetti squash, check out my post where I detail how I cook it here:    http://withlovebycenda.com/2017/03/26/not-your-mamas-spaghetti-and-meatballs/], amounts were not measured. I think it’s sort of a preference thing. 

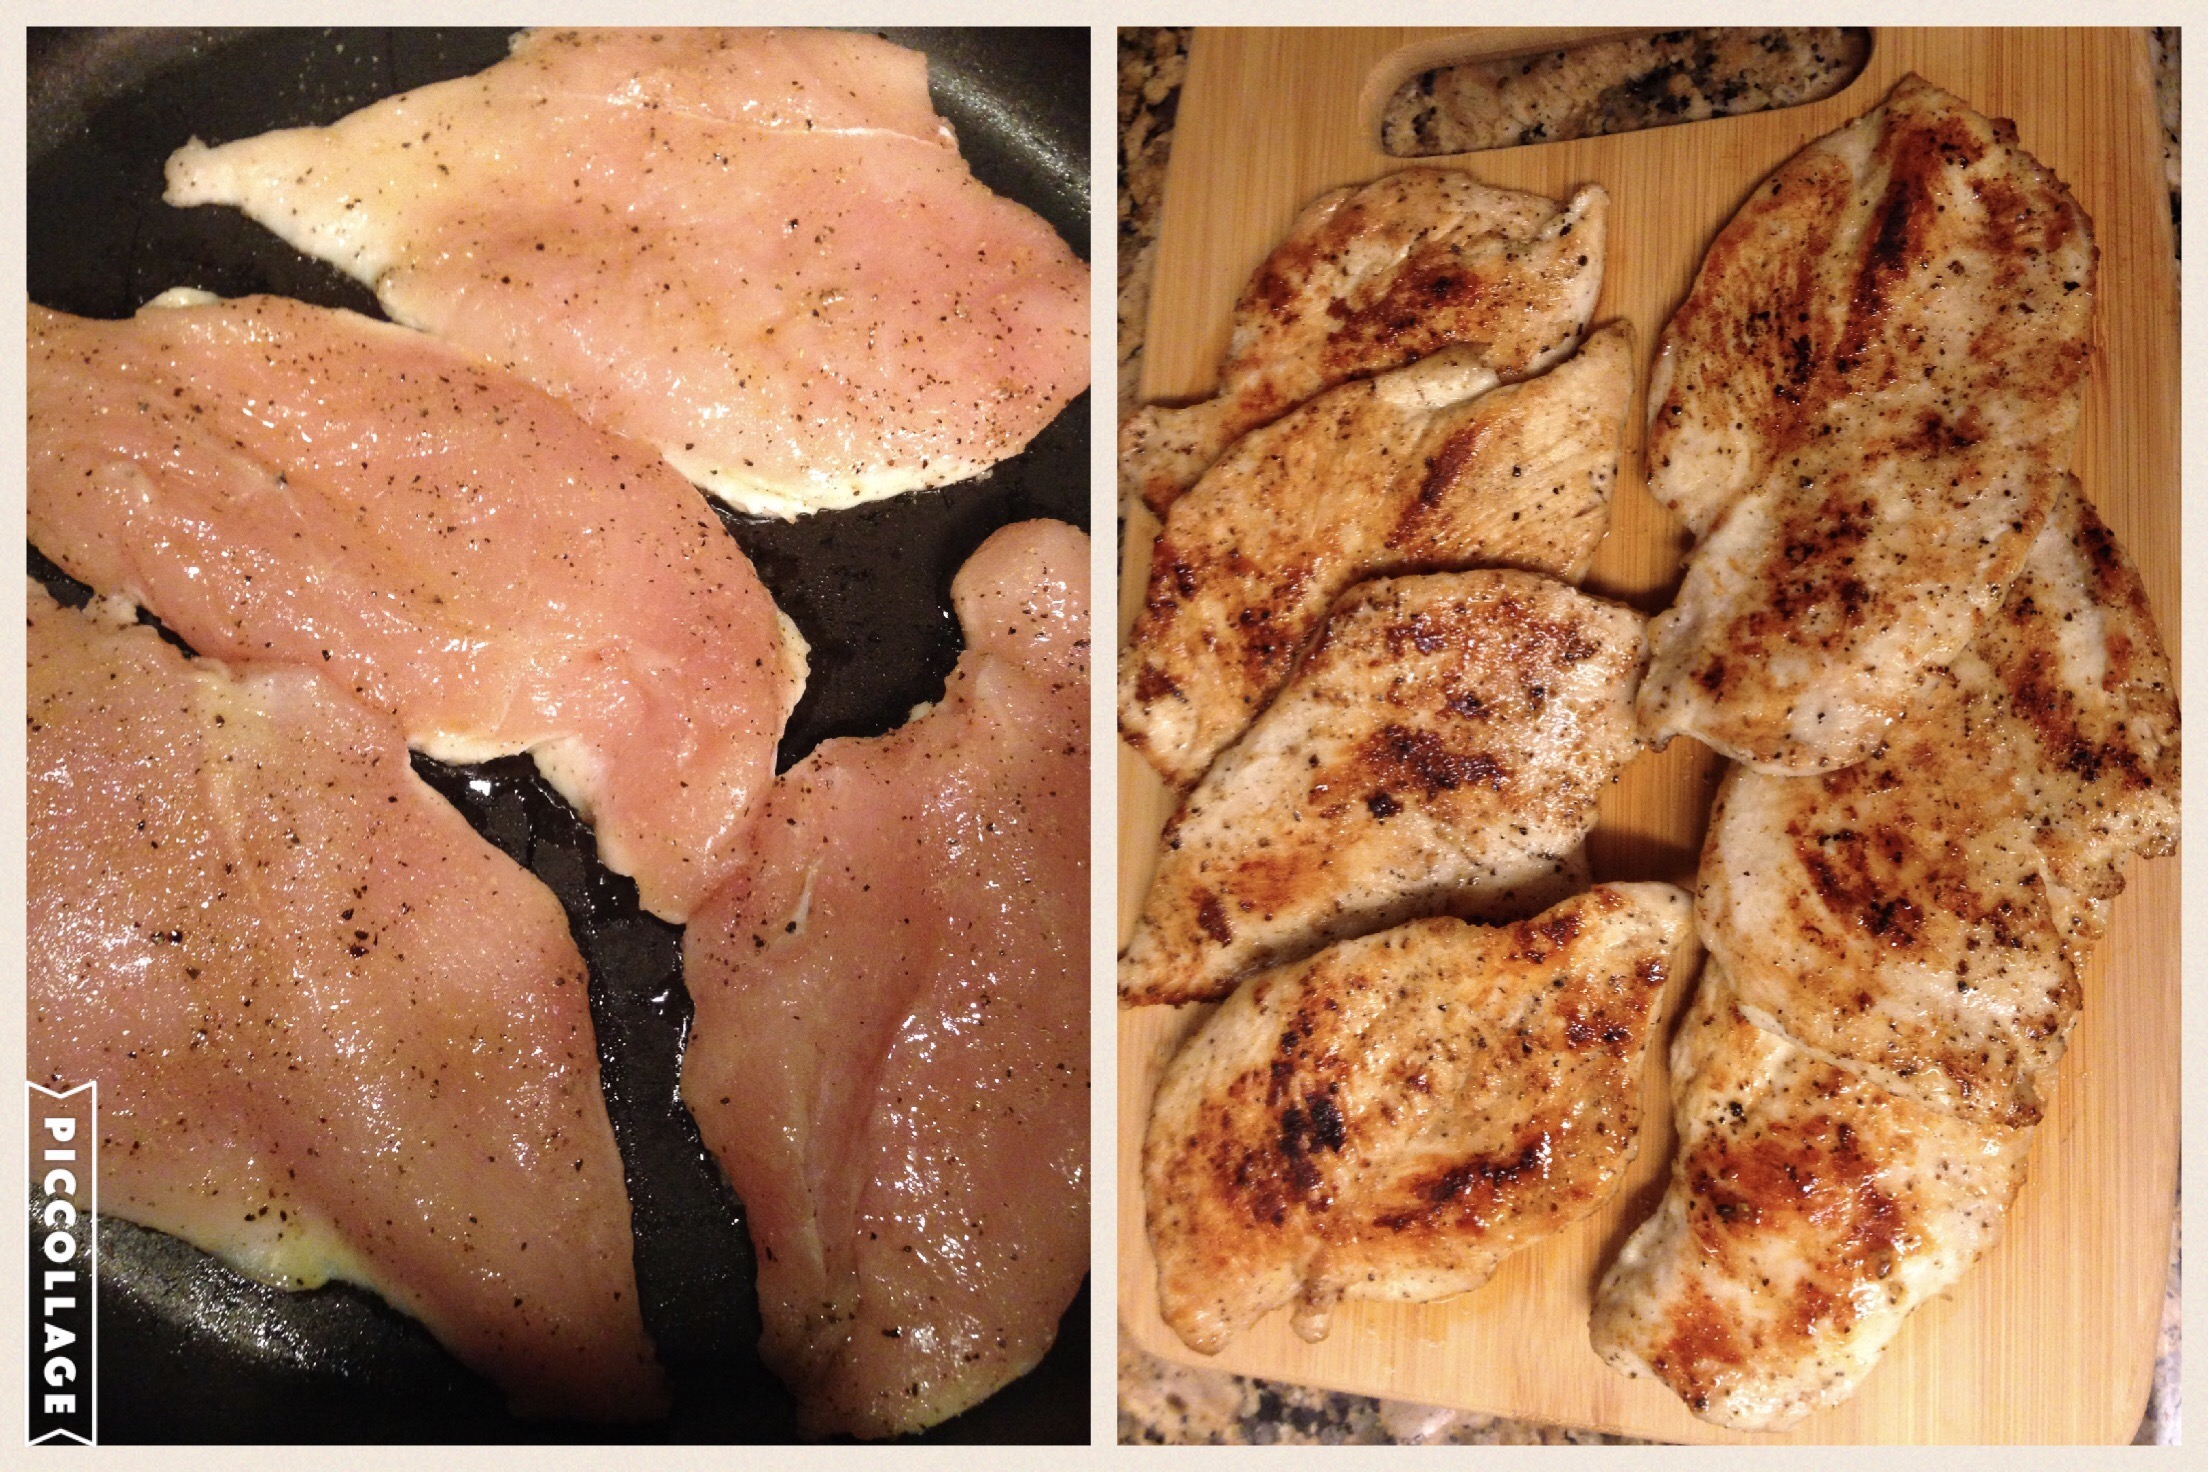
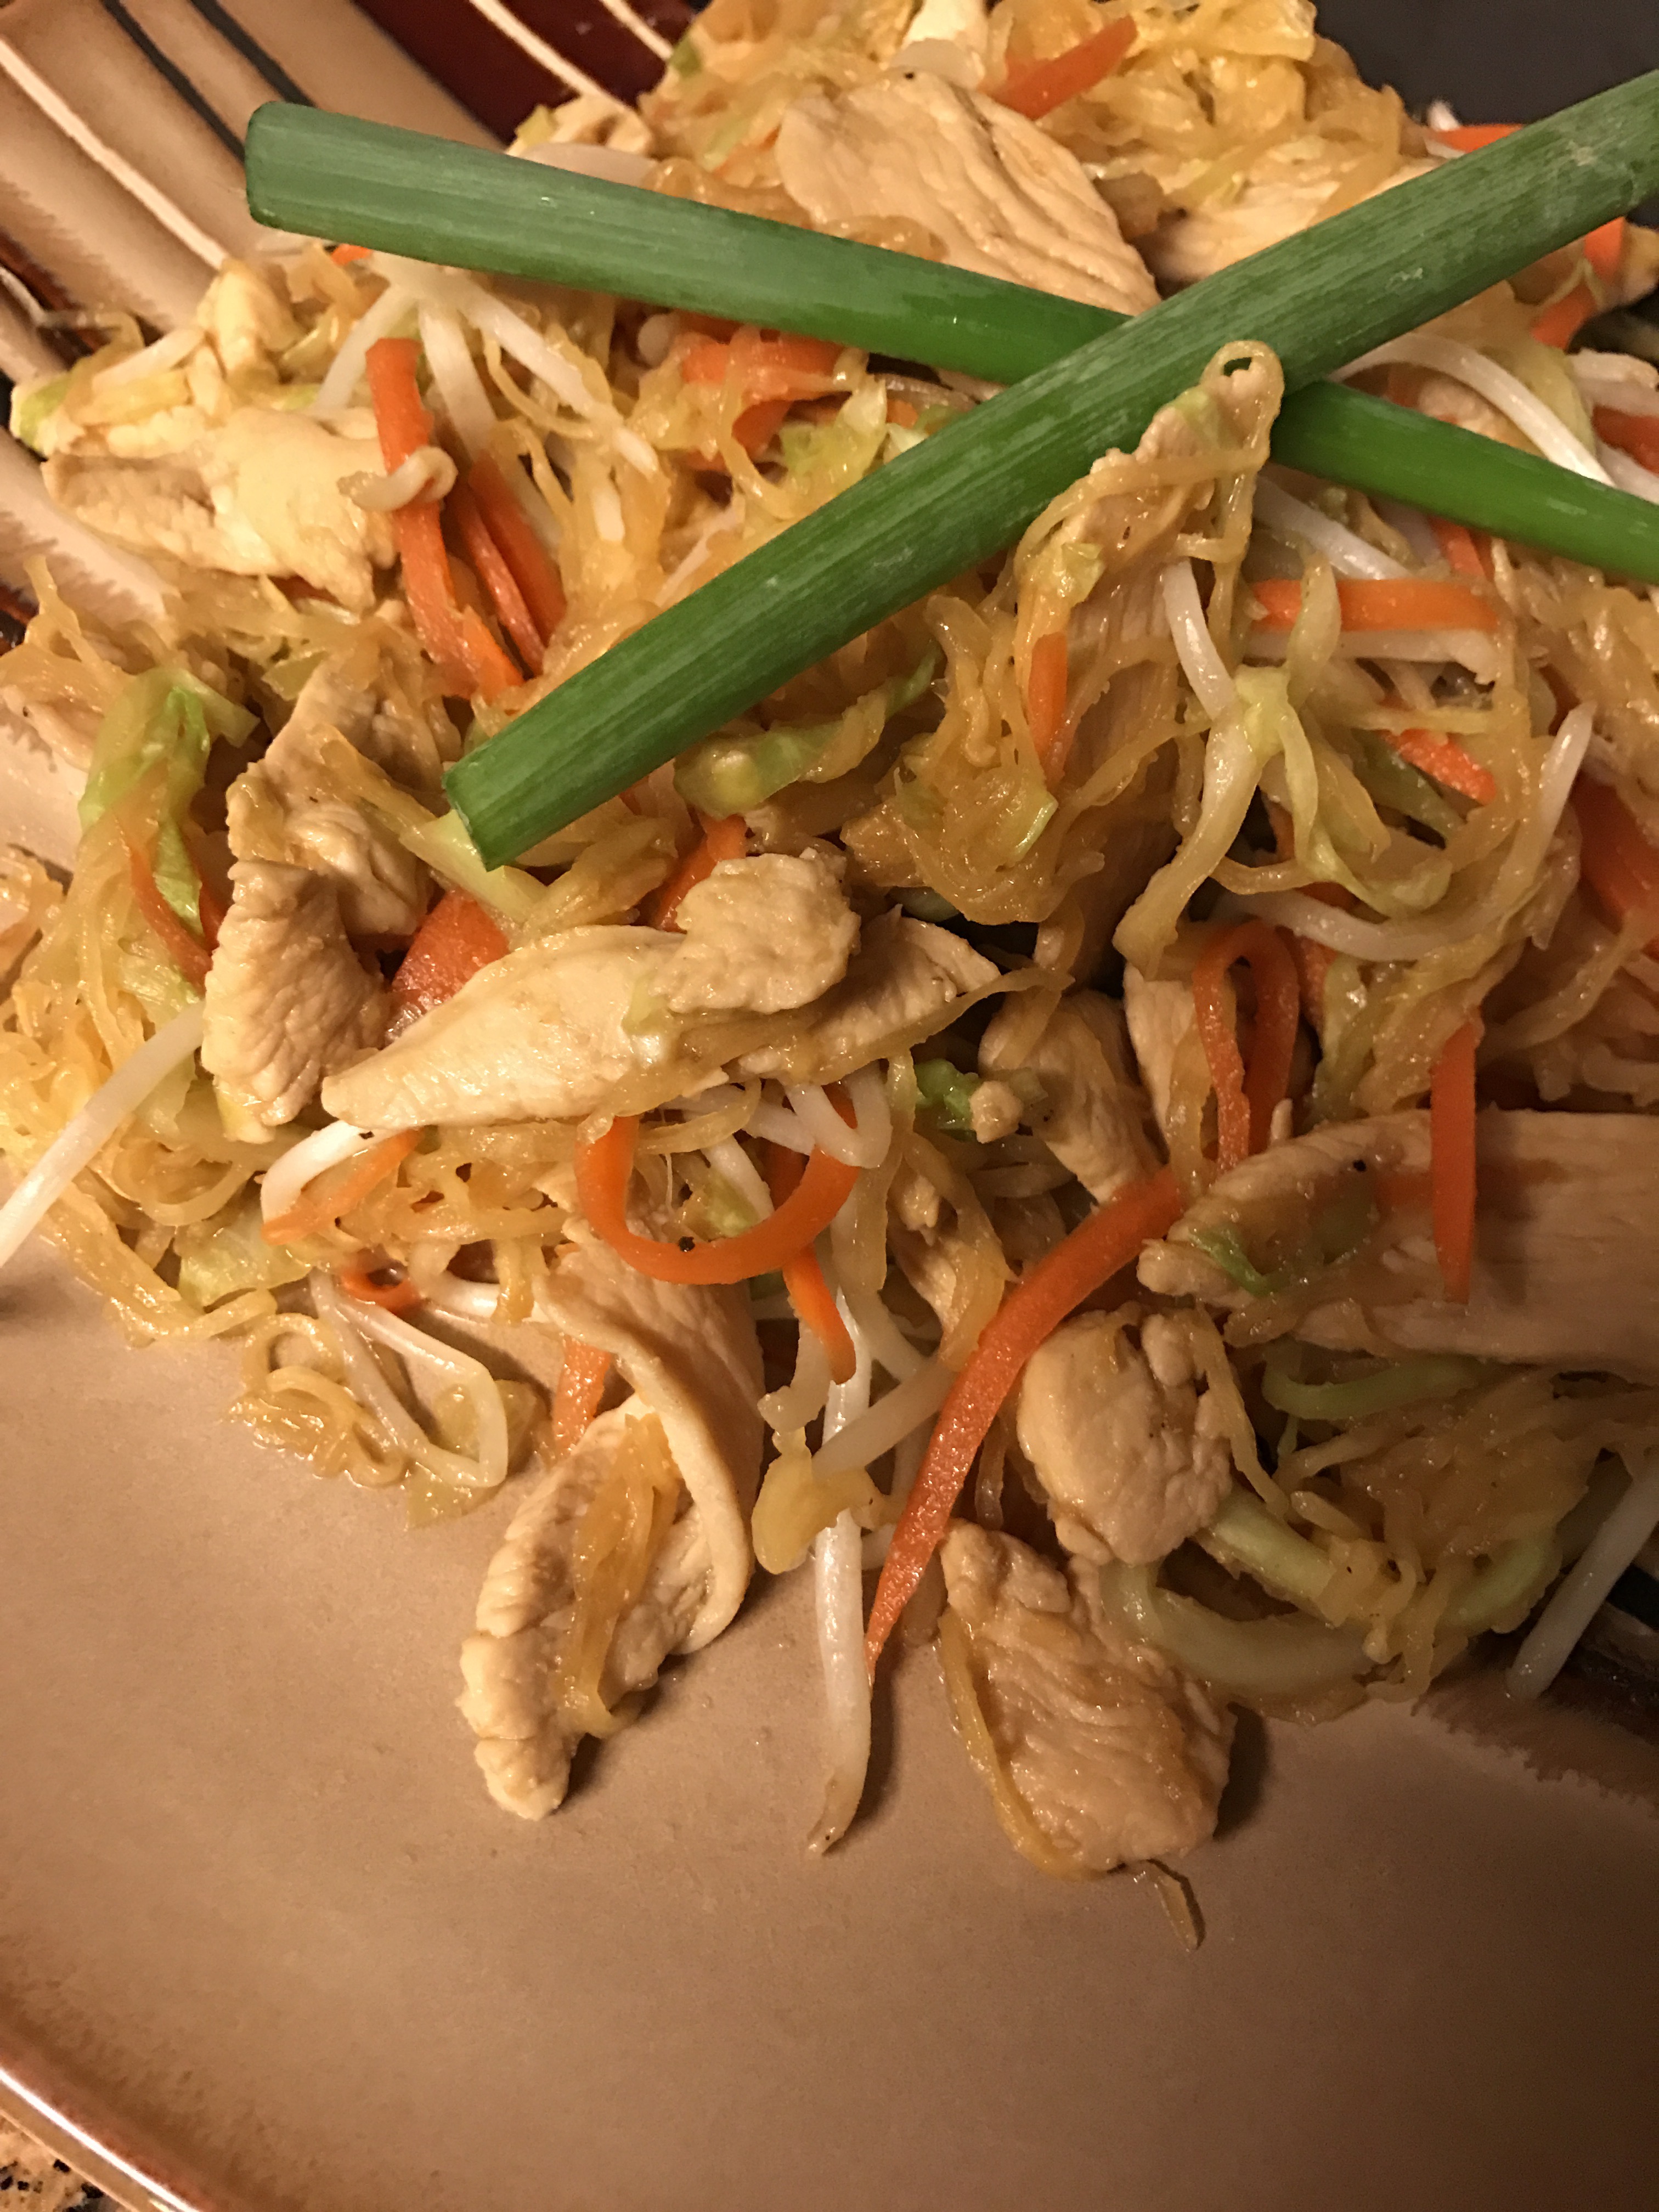
    I put about 1/2 tbsp olive oil in a pan at medium to medium high heat (temps vary so much. Use your judgement), put chicken in the pan and sprinkle with onion and garlic powder. Fry until meat has turned white, but not necessarily cooked through. Add carrot and then cabbage. Once desired tenderness is almost reached for carrots and cabbage add the spaghetti squash. Then, I add a little more onion and garlic powder and the soy sauce. Mix until hot. Then fold in sprouts and serve with green onions on top. (If you like green onions, I would chop them up and add them at the same time you fold in the sprouts. I don’t like them, so I just used them for color and used onion powder to get that onion-y flavor.) 

    That’s it. Super simple. Super yummy. Super healthy.

    I’m going to offer a tip today- 😊

    Today’s Tip: If you make stir fry’s and chow mein’s and the like, enough, you may want to consider investing in this awesome kitchen tool! Man, has it saved me some time! I can julienne carrots in a fraction of the time with this little gem!

    Happy, Healthy Cooking, My Friends! 

    Not Your Mama’s Spaghetti and Meatballs

    I tried spaghetti squash for the first time and I was not disappointed. I didn’t have any expectations of it tasting ‘just like spaghetti’ or having the exact same texture. I went into the experience with an open mind, but no big expectations. I have to say, I was very pleased with my dish. 

    Though, the spaghetti squash is what makes this dish, the Meatballs are pretty important too. So, I’m also going to tell you how I make my Meatballs. 


    But I’ll start with the squash. 

    You can look up a million different recipes on how to cook spaghetti squash. All of them are about the same, in temp and time: Preheat to 375° or 400°, for about 30-45 min, but there are different ideas for most everything else, including, how to cut the squash. I personally like the way mine turned out, so I’ll continue doing it that way: I cut the squash in half length wise (obviously, you can see the pic 😜). There is also some conflicting advise as to whether or not to scoop out the seeds and such. I thought it made more sense to remove it, so the veg would have more of a chance to dry out a bit, and not be soggy. So, I scooped it out before cooking. I drizzled it with olive oil and seasoned with fresh cracked Himalayan sea salt and fresh cracked pepper. I cooked it face up (as you can see) and it turned out good, so that’s the way I would suggest, ’cause it worked for me. 

    Once the squash is tender, it’s done. The next step is just to use a fork to, sort of, scrape the sides to get the spaghetti texture. The video I took wouldn’t load, so I tried to capture one shot to show the angle I shredded: 


    I’m not sure that this next step is necessary, however, my meal was fantastic, so I’m going to tell you exactly what I did: I “spaghetti-ed” one whole side of the squash and put it in a separate bowl that I lined with a doubled paper towel, and set it aside, while I worked on the meatballs. 


    My Meatballs 

    *I left the oven on 400° for the Meatballs. Now, I’ll apologize ahead of time for my lack of measurement, but I don’t really measure. So these are just rough guesses. Please feel free to adjust according to your tastes. -Love garlic? Add more! Ya know?- So I start with 2lbs of Organic Ground Turkey. 93/7. I add about a cup, I think, of my favorite bread crumbs. They are “Italian Style”. You could totally use plain bread crumbs, or I’ve even used crumbled crackers. You just might want to add a little more seasonings if you use plain (and add a little parsley). So the seasonings I use are pretty simple and if you’ve read any of my other blogs, you’ll notice I use these spices for A LOT  of things. 

    • Onion Powder- 1/2- 1 tbsp 
    • Garlic Powder- 1/2- 1 tbsp
    • Salt & pepper- to taste
    • Egg- 1 large egg ***see random Factoid for adjustment***
    • ***Factoid: I have learned, through lots of cooking, that it makes a difference if you are cooking ground turkey that is fresh from the store/fridge, as opposed to ground turkey that you have frozen and thawed. I’m not going to claim to know the cellular structure that has changed, but I can tell you that if it has been frozen, it is going to be a lot more… um.. ‘not dry’. (that’s for any of you who hate the “M Word”, like my sister-in-law 😂 Love you Jess 😘) So, if you are using ground turkey that has been frozen, you may want to start with just the egg white, or it’s going to be too wet. If your mixture is too wet, and you can’t make a decent, round meatball, then you will need to add more breadcrumbs. 

    Now, you want to add all ingredients, mix (You gotta use your hands for this), and roll into balls about 1 inch (maybe less) in diameter , I put them on a cookie sheet with non-stick foil, as I go, and then bake. I think I did 10 min and then turned them, and did 10 more. You can do bigger balls. You’ll just need to adjust the time accordingly. (I like my Meatballs pretty firm and possibly considered over cooked, to other people, so this may be something you want to use your own judgement.) 

    Now we’re getting close to dinner time… 😃

    Once my Meatballs were done, I took the paper towel out of the bowl that I had the squash resting in. I put a decent amount of garlic powder (😬about 1/4 teaspoon? I’m not sure) a bit of parsley (mostly just for color), salt and pepper and drizzled with olive oil. Then I mixed it all together and put it in the microwave for just enough time to rewarm it. (If you don’t have a micro, just throw it in a hot pan for just a min or two to warm it up.) Then I poured the “pasta” back into the vegetable shell, and put the Meatballs on top. 

    Done. 

    Then I enjoyed it! And boy did I enjoy it! A must try, for sure. I’ll be making it again. No doubt. 

    My ‘Go To’ Food Prep


    Chicken.

    I think some people don’t like the idea of “food prep.” The idea of preparing a bunch of meals in advance, portioned into little ‘heat and eat’ Tupperwares, isn’t appealing, and for the most part, I’d have to agree. But food prep doesn’t have to be that. I often premake large portions of chicken to eat in different meals over a few days. I’m pretty sure that’s the definition of “food prep”, but no where in that description is a Tupperware. 

    Now, all the different things I make with my prepped chicken is a whole ‘nother blog entirely (stay tuned- I’m working on that one😉), but for this blog I’d like to just simply explain how I cook my chicken. The method I use has versatile spices, and what I’ve found to be the best way to keep the chicken from drying out. 

    First off, I think the cut of chicken in pretty important. Too thin and you risk dry out because it cooks quickly. Too thick and you risk dry out because you may overcook it in an effort to make sure it’s cooked all the way through. So, I usually butterfly, or even go all the way through and make one thick breast into two thinner breasts. (I should note that I like my chicken on the drier side, so I have been, even known to take a thick chicken breast and slice it into 3 thinner breasts. But whether you do that, depends on what you are using the chicken for and how you like your chicken.) 

    Next, is the spices. Because I use my chicken for a variety of things, I pick spices that are pretty versatile and taste good on everything, in my opinion. But this is clearly a preference thing. I’ll just tell you what I do, but you do whatever your little heart desires. I use garlic powder, onion powder, Himalayan sea salt, and fresh cracked pepper. It’s perfect. Flavorful and simple. 

    For cooking my chicken I always use Organic Extra Virgin Olive Oil. You would think that’s enough explanation, but I’ve found that there are two ways to use it and one uses much more oil and may cause you to overcook and, thus, dry out your chicken. If you pour the oil in you pan, let the oil get hot, and put the chicken in. It will create a tougher outside almost like a crust. This is yummy and is good for some dishes, but for food prep I don’t think this is the way to go. The potential for the chicken to get dried out is high, and the tough ‘crust’ makes it harder to cut into nice slices for dishes. What works best for me, is to put the spices on the chicken and then drizzle and rub the olive oil around. Making sure to cover the whole chicken breast with the oil. I say this because if garlic powder isn’t moistened (sorry if you hate that word 😬 lol) by the oil, then it may burn easily and turn bitter. 

    So, that’s about it. In case you aren’t sure how long to cook it, well, that just depends on the thickness of the chicken. I look for the white to start to come up the sides of the chicken and look for a golden brown color on the meat, then I flip. 

    I think maybe I should mention also that you should never cut a protein right after you cook it. Let it “rest” for at least 5 mins or so. This gives the juices time to redistribute throughout the meat. If you cut it too soon you will lose some of the juicyness to the cutting board or plate that you cut it on. 

    Have a wonderful day and Happy Cooking, My Friends!!

    Please feel free to share this if you think someone would like this info! 

    The Zucchini Pizza

    I MUST HAVE PIZZA!!(Ok maybe a little melodramatic, but, still, I really must.) I love pizza. My last meal: pizza. Stranded on an island: pizza. Who I love more, you or pizza: probably… you get the point. (I kid! I kid! I love you all!) However, in my quest to finally feel comfortable in my skin again, pizza, in the traditional sense, just isn’t something I can have as often as I would like. So, I make quite a few healthy variations of pizza. Today I will tell you all about the Zucchini Pizza! 

    Now, I am a giant fan of looking stuff up on that amazingly helpful search engine we all know and love. I have done that, and found a lot of ideas from other people, but I think I have some tips that make the difference. I have made these quite a few times and they weren’t always great. I’ll tell you what I’ve learned, from trial and error, and maybe you won’t have to make the same mistakes. I’ve made a handy photo with each of the steps, in case you’re a visual learner. Ha

    Step 1. Cut the zucchini in half length wise and scrape out the center so it’s kinda like a zucchini boat. Think ‘pizza crust’ when your scraping. This is one of the first mistakes I made. I left the zucchini much too thick and it didn’t give me that “pizza” feeling. It gave me a “zucchini with toppings” feeling (And an undercooked one at that). Making the zucchini thinner will help it to resemble more of a pizza crust and it will allow the zucchini to cook through and be tender, not crunchy. 

    Step 2. Your ‘crust’ is scraped out. Now cook it. I can’t remember if I ever read about this step from someone else or not, but I think it’s important. To make sure it is nice and tender, and in order to complete step 3. I usually cook mine in a toaster oven. I only use the ‘toast’ feature. This is part of the reason I love this pizza. It’s just so easy. It depends on how big/thick your zucchini is, but I think I usually toast it about 7-8 min. You want it to be soft enough that when you push the sides of the ‘boat’ down you’re able to push them flat. (Of course you don’t want it mushy, so keep an eye on it, everybody’s ovens vary.) 

    Step 3. This step is important, but please practice caution, my friends. When you take the veg out it will be hot. Please let it cool a bit because this next step will burn you if you are not careful. Trust me. Lol. Once it has cooled a bit, fold up some paper towels (kinda thick), and squish it! Yes, That’s right, push down on it pretty good and squish that excess water out. Sometimes you will get more water out than others, but I wouldn’t skip this step. It keeps your toppings from hanging out in a watery boat and it flattens the zucchini for more surface area for your toppings. 

    Step 4. The sauce. I like to go light with this, but going heavy is probably fine, just messy. 

    Step 5. The cheese. When I think pizza, I think; crust, then sauce, then cheese, then toppings. But with the zucchini pizza I use the majority of my cheese on top. Why you say? Because there is not a lot of surface area on here for toppings. With my nutrition goals I need to eat protein! (Thank goodness for my shakes!) Its not always easy for me to get in as much protein as my awesome trainer wants me to consume. That being said, I need to try to cram 4oz of chicken on two little halves of zucchini, so I use the cheese on top as my ‘glue’ to hold all my toppings on. Thus, the reason for very little cheese at step 5. Of course people can do what they want with their cheese and toppings. This is just a tip in case, like me, you may need to use your cheese for ‘glue’, Don’t put it all on after the sauce, like any right minded pizza lover would. (I know people like pizza all different ways. I’m just kidding. 😉) 

    Step 6. Toppings!! Of course this is a preference thing. I happen to love these three toppings. I love chicken. I love the red bell pepper for the crunch and I love the olives for the saltiness. Get crazy! Do whatcha like. 

    Step 7. Cheese ‘glue’! This is the key to my toppings staying on so I can eat it with my hands like you usually like to eat pizza. I have a few tips here: •Use nonstick foil. (I weigh my ingredients to accurately record what I’m consuming. I’ll be damned if I’m gonna lose a 1/2oz of cheese because it’s crusted on to the foil! Lol. Maybe that’s just me. Can you tell I love cheese?) •Add your cheese after you have put your pizzas on the foil. (You’ll never transfer it onto the foil without losing a bunch of cheese and/or toppings.) •If you push the zucchini halves right next to each other it helps prevent topping loss. 

    Step 8. It’s cooked. Everybody’s ovens vary, so I think you guys are on your own for this one. I toast mine for probably another 7-8 mins.

    Step 9. Enjoy. (Note how thick the “crust” is in this pic. For me, perfection.) 

    My Zucchini Pizza had:

    1 zucchini 

    1/2oz Pizza Sauce

    1 1/2oz Mozzarella Cheese

    4oz Chicken

    12.5g Red Bell Pepper

    3 Olives

    237 calories, 32g protein, 5.6g carbs, 8.9g fat
    I hope you give one of these pizzas a try. If you love pizza and you are watching your waistline, they really do help curb your pizza craving. They are surprisingly filling and they are good for you! 

    Always be prepared


    For me, one of the biggest factors in falling off my nutrition game, is simply failing to prepare. [I would insert the famous Benjamin Franklin quote here, but I’m gonna save it for the end 😉] As many people know, busy moms or not, life gets crazy. The things you have to take care of in the day, feel like they don’t fit in the 24 hours you’ve got. So these are two salads I like to prepare ahead of time, so that when the day gets ahead of me I have something healthy in the fridge to eat, and I don’t end up making crappy decisions about what to eat in a hurry. I’m making this post because last week I fell victim to the “too busy to make something healthy” excuse. So this is my little reminder to myself. I do have my shakes. I usually chose to have one of those for breakfast and one post workout, so the rest of the day I’ve gotta make good decisions. Unfortunately, if I’m unprepared I will more likely skip a meal, than eat bad. Which is also terrible for you. Don’t think you’re doing yourself any favors by skipping meals. You can cause your metabolism to tank and super slow down when you do that. No bueno. The solution: be prepared. 


    These two salads are similar because I’m a creature of habit. I like what I like, so I just keep eating it. I change it up a bit, so I don’t get tired of the same thing, but I do what works for me. I feel like you can really add anything healthy to these that you like, but I’ll tell you what I add and why.
    Avocado- I always add avocado. Do you have to ask why? Because avocado is delicious! It’s got ‘good for you’ fats and it’s a very nutrient dense food, with nearly 20 vitamins and minerals in it. Nuff said. (Well, also it helps to add moisture and acts as a ‘mayo substitute’ sorta.) 
    Olives and pickles- these may seem odd to some, I’m not sure, but I love them. Mostly because of the saltiness they offer, but also the texture. The crunch that the pickle adds is crucial.
    Red Bell Pepper- also important for adding to the texture. Crunch is crucial. You don’t want a bowl full of mush. (Unless that’s your thing. Then you do you. Lol) I happen to love bell peppers, but you could substitute celery or onions, for crunch. Neither of those are my jam. Like, I don’t wanna ‘yuck somebody’s yum’, but not the texture I like 😬. (I do add onion powder. I like the flavor, just not the texture)
    The mayonnaise substitute- this is important for me. Most people use mayo in tuna or chicken salad. If you aren’t watching your waistline that’s all well and good, but I am. So, I need something to hold everything together. Most “healthier” recipes of these salads call for plain Greek yogurt. I like that, and I do that some times. Sometimes I use the combo of greek yogurt, salsa, and avocado. That’s a nice way to change it up. But one time I was out of Greek yogurt and needed to come up with something else. What I chose to experiment with instead, was really good! Like, I prefer to use that over Greek yogurt now. I’m not sure if this will also seem odd to others or not, but to me it’s good and worth mentioning. I used cottage cheese! It was good! 

    The protein- this one is pretty self explanatory. I use chicken breast that I have made in advance. I usually try to make chicken breast every week and use it in a bunch of different things. (Whole ‘nother blog idea right there- Uses for Prepreped Chicken- Coming Soon) I just chop it up to pretty small pieces. You could also shred it. Up to you. And the tuna I use is Solid White Albacore, but you can use whatever you like. 

    Put whatever you think sounds good in it! (Don’t forget the spices! I use onion powder, garlic powered, salt, and pepper sometimes.) Just remember texture is good! And put it on whatever you want too, just remember this is a delicious low carb meal. You don’t have to put it on anything (often I eat it right out of the bowl), but I wouldn’t put it on a big ‘ole carb-y bun. That would really defeat the purpose of trying to prepare ahead of time and being super mindful of your meal. 

    Remember:

    Be healthy and happy, my friends.